Deploying Your First Model
RunGen.AI aims to make AI deployment as easy as creating the website. This guide will walk you through the process of selecting a model, deploying it, managing resources, and using it in the playground.
1. Deploying a Model
Choose a Model
You can deploy models from platforms like Hugging Face or CivitAI. RunGen.AI currently supports image-generation as well as smaller language models. To get started:
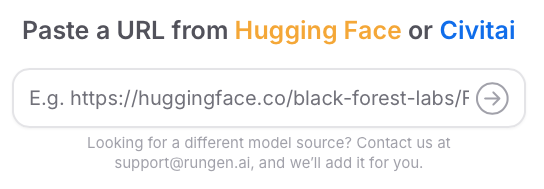
- Find a model on Hugging Face or CivitAI.
- Copy the model's URL.
- Visit our platform, and select "Create a new app".
- Paste the link into the text-field:
Instead of selecting a model from HuggingFace or CivitAI, you can also pick a trending model directly on the Create App screen.
Configure Deployment
After selecting the model, you will have a few options to configure your instance. Image models can even add LoRas for fine-tuning.
Adding LoRAs (Image Generation only)
For image models, RunGen.AI supports adding LoRAs from CivitAI. After pasting a link to an image model, you will automatically be prompted to add LoRAs.
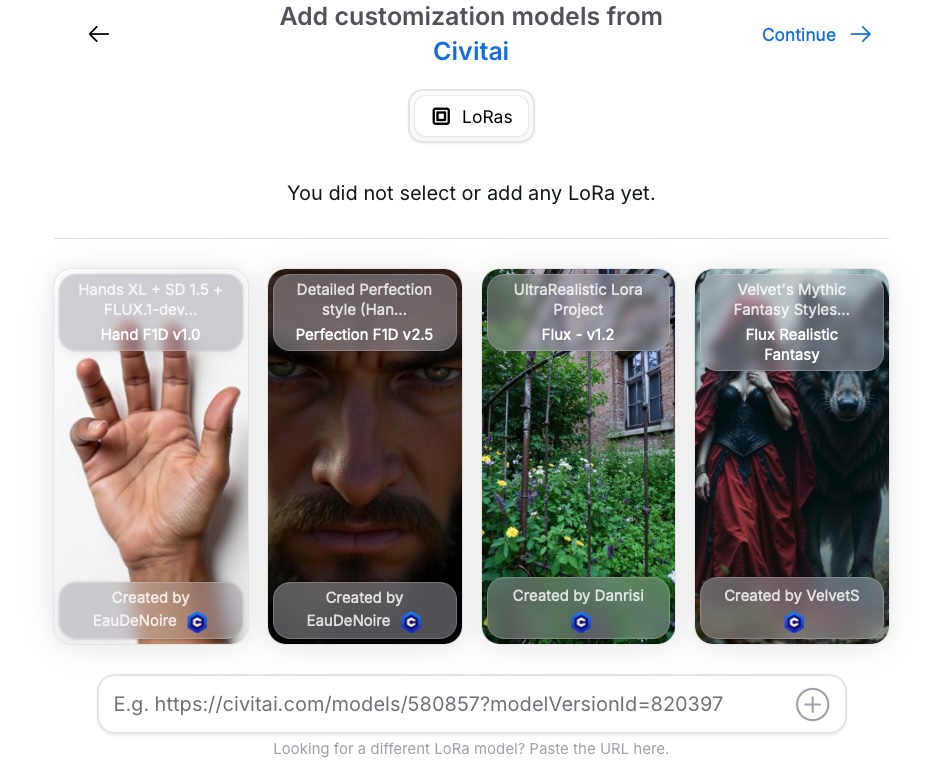
You can either:
- Select a suggested trending LoRA by clicking on the preview
- Paste a link to a LoRa (you can use CivitAI's search – filter the model type for 'LoRA') – Skip this step, and continue to the Application Setup (button on the top-right)
You can also select multiple LoRAs
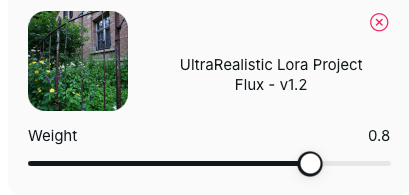
If you decide to add LoRAs to your model, you can configure the strength of each one by using the presented slider:
Application Setup and Finalize Deployment
After your model selection has been completed, you can make final adjustments such as setting an application name or choosing your instance tier (Learn more about instance tiers).
Selecting the instance tier will determine how fast your model can run. For tested models, all displayed instances will work. However, some large untested models, especially LLMs, might fail to start on smaller instances.
Once you're ready to go, click Create App to get the app ready for deployment.
2. Adding Credits
Before being able to deploy the model and start an application, you’ll need credits in your RunGen.AI account. You can add credits via all major credit cards using the Top Up Balance button in your settings.
To access settings, click your profile picture in the top-right corner of the platform, or use this direct link.
3. Starting The Model
To start your model, navigate to the dashboard. All your applications will be listed.
To start-up an instance, use the Activate button. This might take a while. Clicking on the model will also open the playground and provide further configuration options:
- Start or stop models to start processing requests
- Scale up or down to match workload demands.
- Change instance tier to adjust performance.
- Monitor logs for performance insights and debugging.
Your balance will be debited for each minute the model is running. If you're just experimenting, we suggest to deactivate the model while you're not using it.
4. Using the Playground
With your model running, test it in the Playground:
- Navigate to your running application from the dashboard.
- You can prompt your model, and view real-time responses.
- View real-time responses from your deployed model.
Next to the playground, you'll also find some helpers to use the model via API.
Ready with experimentation? Start using your image models or LLMs.
For advanced use cases, you can also check out our API documentation to connect your application programmatically.
Now you're ready to deploy and run AI models with RunGen.AI!
Need Help?
If you have any questions, send us an email or write us on social media.